|
|
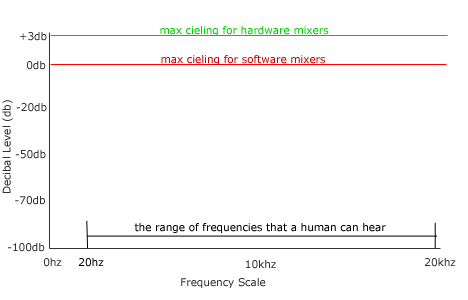
How to Mix Down a SongEvery musician goes through a different process when creating a mix but generally the process goes through three stages: creating the initial tracks, mixing down the song, and then mastering. Each one of these stages is usually done by a different person, each one a professional in their field. A musician will create the song, a producer will mix the track, and a mastering engineer will master the track to production quality. With indie labels on the rise allot of these jobs are done by the same person, you. I highly recommend hiring a mastering engineer, if you can actually afford to do so. But like most musicians your struggling, so lets get on with a few tips to help you create a production worthy mix, on a musician style budget. In this article we are going to cover mixing down your track. Mixing LevelsTwo of the biggest problems with mixes today are the levels of instruments and muddying of frequencies in a mix. Lets go over a few basic guidelines when mixing a track. There is a difference to mixing levels on a software mixer as opposed to a 32,24 or 16 channel analogue mixer which can handle about +3 db without clipping, this will vary on the quality of mixer that you are using. When mixing with software the ceiling of your mix is 0db (no exceptions) anything louder than this will clip the audio signal and cause artifacts or bad distortion to your sound.
The following are only guidelines to what levels some of your tracks should be placed at and these can obviously be altered as your mix evolves
Now at these levels you should notice how loud and punchy your song sounds when comparing your song back to back with a professionally mixed CD. You should also notice that your percussion, although sounding quiet, gives more drive to the song and a less quantisized feel. Frequency PlacementThe human ear can hear between 20hz (low) to 20khz (high) illustrated in the diagram shown above. Now we know the frequency limit in which we have to span our instruments across, anything outside of this should be eliminated with an equalizer. Proper frequency placement is done by proper equing and instrument selection. In the song each instrument should cover a different span of frequencies and peak at varied frequencies. When mixes are done right each instrument occupies its own frequency space without overlaying too much on another sound, and that no peaks are canceling each other out or causing severe muddying within a mix. Onto adding effects to the tracks. You may have already added different effects to each track when you were in the initial song creation stage. Now during mix down you want to make sure that all of your instruments sit right within a 3 dimensional space. This is achieved by both panning the instruments and the added use of reverb on some of the tracks. The bass and kick drum are usually centered and without reverb. The high hats are panned to the right or left fairly hard. Depending on the style of mix your doing may depend on the panning placement of other instruments in your mix. A good tip is too cross reference the seating arrangement of an orchestra and pan your instruments accordingly as if you were hearing it from front row center. I have also heard of specific note panning for pianos where each note is panned high to the right and low to the left and the amounts vary according to how high or low on the octave scale you are. As for the use of reverb on a track please check out our article on "Using Reverb" |
